


EZ-Xtend Straight Drip Shield Bimini Top Rain Shields
- Straight Drip Shields are for use between two enclosure panels.
- They do not round the corner like corner drip shields.
- Drip shields are stick-on clear vinyl shields that keep out the elements between two enclosure panels on your Bimini top, helping to close any gaps that exist.
- Stick on adhesive works with Sunbrella and all other marine fabrics.
- Click here for Instructions
Drip Shield Installation
Drip Shield Installation
Tools required:
- Reasonably sharp scissors
- Soap
- Water
- Scrub brush
1. Thoroughly clean fabric where drip shields will be secured. If
that means soap and stiff bristled brush to remove all mold,
mildew and loose dirt etc., then do so.
2. Remove any old Velcro and thread. You want the shields to
have flat, clean fabric to adhere to.
3. Let dry completely.
4. Hold drip shield up to determine the best location. This is the
time to trim to desired size should it be needed before
paper is peeled off the adhesive.
5. Once you are sure about the location and position. Peel and
stick drip shields in place. Drip shields should not be lifted
and stuck over and over. This will weaken the adhesive.
Get it right the first time.
6. Press fabric and adhesive together, using strong finger
pressure to make a secure bond.
7. Allow adhesive to set 24 hours before exposure to excessive wind,
or water. This is an aggressive adhesive. The bond strengthens as
sets.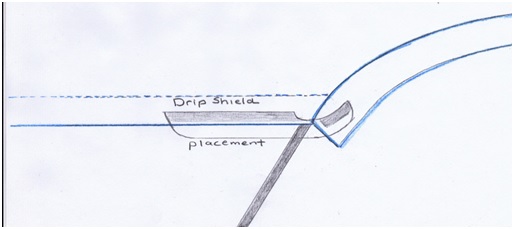
1 Review
-
Drip
Works as expected


